2025

Documentation
Getting Started
1. Visual Studio Code
1. Download Visual Studio Code. (Recommended)
2. Download Python 3.7 or newer (tested on Python
3.8/3.9/3.10/3.11)
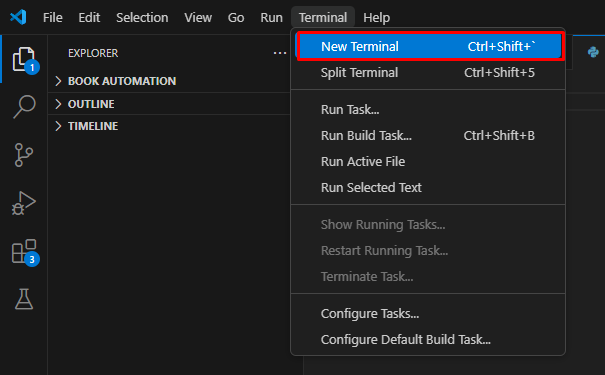
3. Configure Visual Studio Code & Terminal
1. Open Folder (This is the folder where you want to have the OpenML project)
2. Open New Terminal
3. Install the dependencies
4. Dependencies (use pip3 for python3)
pip install opencv-python ultralytics numpyOr
pip install opencv-python==4.8.0.76
											pip install ultralytics==8.0.196
											pip install numpy==1.24.4
If OpenCV does not work try to reinstall it using the method above
(or retry using the methods below)
pip install opencv-python Example

5. Hardware Requirements
6. Test Camera Python Script
camera_test.py (Click
to
download)
import cv2
	cap = cv2.VideoCapture(0) #If it doesn't work, increment the number by 1 until the camera works and appears on the screen
	ret, frame = cap.read()
	print("Camera working:", ret)
	cap.release()
Then
python camera_test.py7.If the camera works, download the ML model from
Resources
8. Calibrate The Camera
9.🎉If you have successfully completed all steps, you can proceed
to Python Code For Detection to test the OpenML model 🎉
10. Additional Notes
Setup
Getting Started
2D Sample Detection
3D Sample Detection
Training ML
Examples